The application of dry heat can dramatically alter your dishes by introducing new flavors and textures. There are four main ways to employ dry heat: Searing, Sautéing, Roasting, and Broiling. Depending on what you’re trying to accomplish, whether it’s getting a perfectly cooked steak, a beautifully browned chicken, or perfectly roasted vegetables, you’ll need to know when to use each method.
Searing: Creating That Perfect Crust
Searing creates a very dark, flavorful crust on meats (and sometimes fish) through the application of extreme heat. As one would expect, most applications of Searing occur in conjunction with other methods. The Maillard Reaction occurs when the amino acids and reducing sugars in foods react to the intense heat produced by the pan. This produces a variety of flavors and browns.
You must first select the correct equipment. A good skillet must have a base made of either cast iron or stainless steel. Cast Iron pans absorb and distribute heat evenly, whereas stainless Steel pans tend to reflect the heat and cook faster. Regardless of your choice, ensure that the pan has reached its maximum temperature before adding the oil and your protein. To determine if your pan has reached the optimal temperature, sprinkle a few droplets of water into the pan. If the droplets sizzle and disappear immediately, your pan is ready.
Use oils that have a high smoke point when searing. Some examples include canola oil, peanut oil, and grapeseed oil. Add only enough oil to coat the bottom of your pan. When the oil starts shimmering slightly, it’s time to add your protein. Remove as much moisture from your protein as possible with paper towels prior to adding it to the pan. Excess moisture inhibits the browning process. Generously salt and pepper your protein before placing it into the pan. Salty and peppery flavors enhance the crust that develops during searing.
Add your protein to the pan carefully. Overcrowding the pan leads to steaming instead of searing. Cook the first side of your protein for 3-5 minutes for thicker cuts of meat or fish, then flip it over and continue cooking. Thin cuts of fish may only need two minutes per side. The goal here is patience and accuracy; do not constantly fidget with the protein.
After you’ve completed the initial searing phase, there are several options for finishing your protein. Common alternatives include roasting or braising. By finishing with a slower method of cooking, you will ensure that the inside of your protein reaches your desired temperature while maintaining a crispy exterior.
Sautéing: Speedy Preparation
Sautéing involves rapidly cooking ingredients with limited amounts of liquid to preserve their original texture and provide a burst of flavor. Sautéing is ideal for vegetables, seafood, and thinly cut pieces of meat. Due to its speed and versatility, it offers endless possibilities for preparing meals. The term “sauté” comes from French for “to jump,” because you are literally jumping or tossing the ingredients in the pan to ensure equal exposure to heat.
First, choose a pan that allows for ease of motion. Skillets that are large and flat work best. Next, place the pan on the stovetop over medium to medium-high heat and add a small amount of oil or butter once the pan has reached the appropriate temperature. The amount of oil/butter added to the pan should barely cover the bottom of it, to prevent sticking and promote browning.
Regardless of the ingredient(s), try to chop them into similar-sized pieces. Cutting carrots into round slices or sticks makes them easier to stir/fry. Be aware that various ingredients have vastly different cooking times. Begin with ingredients that take longer to cook, followed by those that cook more quickly. A classic example would be cooking mixed vegetables together; you’d start with ingredients that take longer to cook (such as onions and carrots), followed by ingredients that cook more quickly (like bell peppers and zucchini).
While cooking ingredients in a pan under high heat, constant agitation/turning/stirring is required to prevent burning. This becomes increasingly difficult when applying extremely high heat. Protein (for example, chicken breasts, boneless chicken thighs or shrimp) typically requires cooking until golden brown on both sides. Chicken breast should reach an internal temperature of 165° F.
Consider incorporating aromatic ingredients (garlic, ginger, etc.) towards the end of your cooking period. Burning these will detract from the overall quality of your meal. Alternatively, adding a liquid (wine, broth, water) near the end of cooking provides additional flavor. For example, you could deglaze a pan containing cooked chicken and vegetables with white wine and complete with butter to create a smooth sauce.
Roasting: Developing Flavor
Roasting brings out the inherent flavors in ingredients through the gentle warmth provided by your oven. Both meats and vegetables benefit greatly from roasting, as they concentrate flavors and develop contrasting texture (crisp outside/tender inside).
Begin by heating your oven to whatever temperature you plan on using (typically between 375°F and 450°F). High temperatures produce a crispy/caramelized exterior. Regardless of whether you’re cooking vegetables or meat, it’s essential that your ingredients be cut similarly in size to cook evenly. Lightly drizzle olive oil and sprinkle salt and pepper over vegetables as they are spread across a single-layered baking sheet.
If you plan on roasting larger pieces of meat (e.g., a whole chicken), remove it from refrigeration approximately 1 hour prior to cooking. This increases evenness in cooking. Season the cavity and skin of your chicken liberally with salt, pepper and/or herbs. Placing the chicken in a roasting pan with air space below aids in drying out excess moisture accumulating at the bottom and prevents sogginess. Roast at 425°F (approximately 20 minutes/lb) or until your chicken reaches an internal temperature of 165°F.
Another advantage of roasting lies in its ability to elevate ordinary vegetables to rich/sweet levels through caramelization. Slice or chop vegetables like carrots, potatoes, sweet potatoes or Brussels Sprouts, lightly drizzle with olive oil, sprinkle with salt & pepper or additional seasonings/herbs and roast at 400°F. Every 10-15 minutes, gently turn/rotate your vegetables to ensure even browning.
Broiling: High Heat Directly Above
Broiling replicates grilling conditions within your kitchen by allowing high-temperature heat directly above food (usually on an upper shelf). Broiling excels at developing a crispy exterior/brown color quickly on foods that are relatively thin. Examples include: Flank Steak, Salmon Fillet, or even casserole tops.
All modern ovens feature a broiler component located somewhere in or above the oven compartment itself. Position the oven rack 4-6 inches from the broiler unit; this distance depends upon how powerful your broiler is and how thick your food is. Preheat your broiler (typically takes 5 minutes).
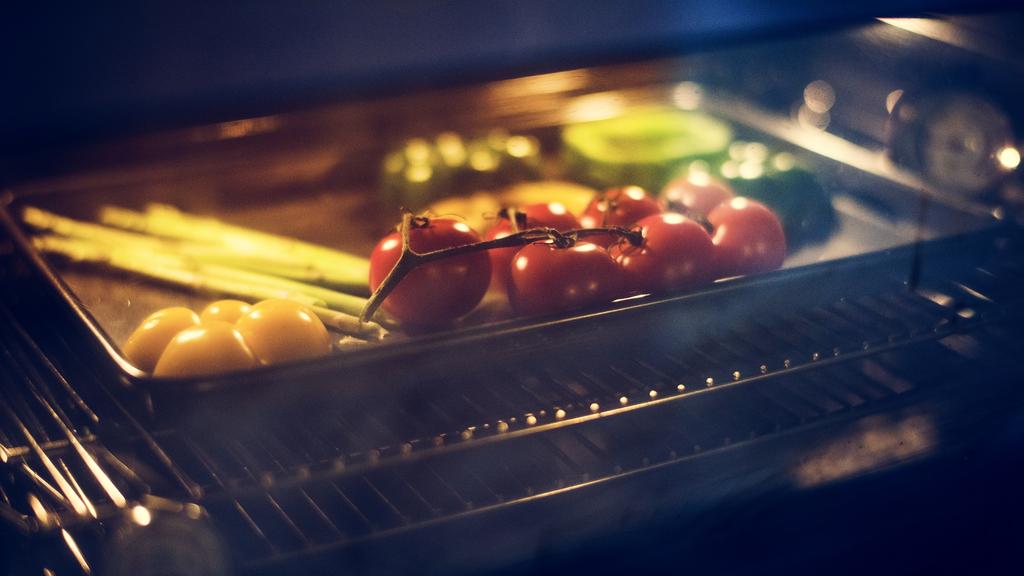
Broiling works exceptionally well for thinner cuts of meat/protein/vegetables/casseroles. Flank Steak can be broiled for 5-7 minutes on each side for medium-rare; be cautious with high-sugar marinades since they can easily cause charring/burning on the surface of meat. Similarly, toss cherry tomatoes/asparagus lightly with olive oil and season before arranging them on a sheet lined with aluminum foil to prevent sticking and facilitate high-heat charring/caramelizing.
Because of broiling's nature (employing extremely high heat) constant monitoring of food is imperative. Failure to do so can result in burnt food.
Dry-Heat Techniques Selection Guide
There are numerous elements involved in determining which dry-heat technique will yield better results for specific applications.
Searing: Utilize this technique to create a bold crust on meats/fish prior to finishing them via an alternate technique like roasting/braising. Sautéing: Ideal for rapid preparation with vibrant flavors; excellent for veggies/proteins that need to remain tender/moist. Roasting: Suitable for larger portions of meat/veggies with emphasis on caramelization/softened interior. Broiling: Excellent option for quickly developing a browned/crispy outer layer; perfect for thinner cuts of meat/quick toast toppings.
Tips for Success
Mastering dry-heat cooking techniques can significantly improve your prepared home-cooked meals. Listed below are general suggestions for improvement:
Prepare all of your tools/heating surfaces: Ensure that all surfaces/pans are heated adequately to promote development of texture/flavor. Utilize the right amount of fat/oils: Too little fat causes sticking/burning; too much fat can result in sogginess; find a balance, utilize just enough to coat the bottom of your pan. Don’t be stingy with seasonings: Dry-heat enhances flavors; therefore generous salting/seasoning will emphasize flavors in addition to highlighting them. Let proteins rest: After cooking your proteins allow them to sit for several minutes; redistribution of juices yields increased flavor.
FAQs
How do I stop my meat from sticking to the bottom of my pan when searing?
When adding your meat to a preheated pan coated in hot oil, do NOT touch/nudge/move it until it releases naturally due to forming a crust.
What is the best approach to achieve even browning when roasting vegetables?
Uniform cutting sizes reduce crowding issues; spread vegetables out evenly on baking sheets without overlapping; mid-cook rotation encourages even caramelization.
Can I broil meats that are marinating?
Yes; however, make certain to pat-dry meats before broiling and limit high-sugar marinades to avoid scorching/burning.
Must I flip food while broiling?
Yes; you must flip food, otherwise uneven browning will develop on both sides; especially true for thicker pieces.
Conclusion
Mastering dry-heat cooking methods (searing, sautéing, roasting and broiling) unlocks potential in preparing new flavors in home-cooked meals. Each method affords opportunities to explore/experiment/refine techniques transforming ordinary ingredients into spectacular meals.