Professional kitchens don’t ever stop making stock. It isn’t due to tradition or stubbornness – it is due to the fact that a quality homemade stock is the single most flavorful liquid you can add to a meal. Nothing from a box or cube compares to the homemade variety. Stock provides the basis for soups, sauces, braising liquids, risottos and gravies. Stock is the distinguishing factor between a bland, watery soup and a great-tasting soup that was clearly simmered for hours – as it usually is. This article explains stock; how it is differentiated from broth; the components involved in creating each; and the value in dedicating a couple of hours to creating homemade stock that will enhance dozens of other meals.
Stock vs. Broth – What is Really the Difference?
Stock and broth are commonly referred to as identical items, yet they represent two distinct foods with differing uses and characteristics. Understanding the differences between these two will allow you to select the appropriate item to utilize in every cooking application.
What is stock?
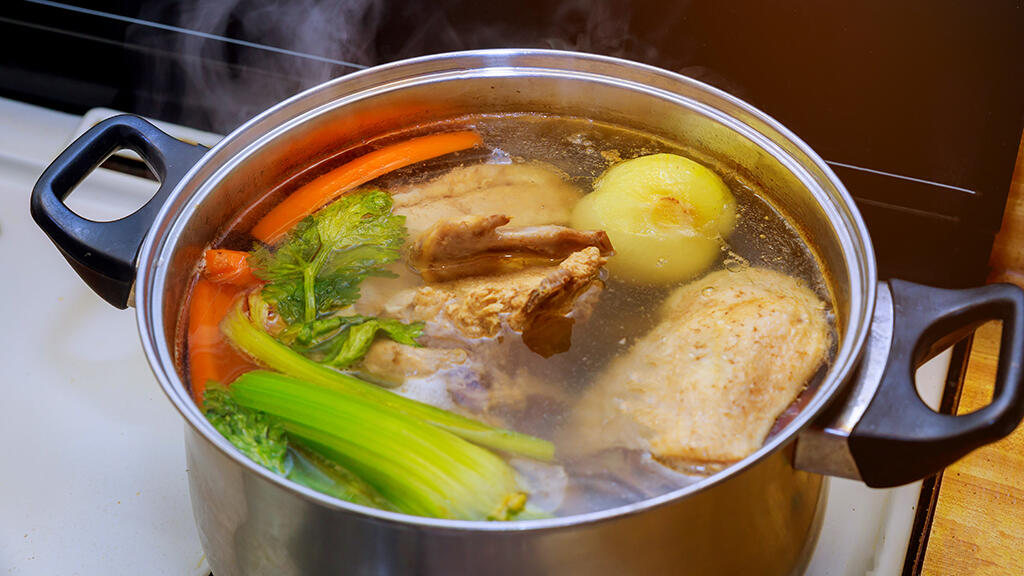
Stock is produced using bones – sometimes with meat attached – and aromatics (vegetables and/or herbs). The bones are placed in a pot with sufficient water to cover everything, including the aromatics. The bones are simmered for an extended period of time (typically three to five hours), during which time the collagen present in the bones breaks down and becomes gelatin as it dissolves into the water. When stock cools completely, a good stock should solidify to a loose jelly; when it remains liquid, it is not a good stock. This gelatin content is the primary component that distinguishes a good stock from a poor stock. Gelatin is what contributes richness, texture, and depth of flavor to dishes – none of which can be replicated by water-based broths.
What is broth?
Broth is created using meat (with bones optional), and is prepared in such a manner that it is consumable on its own. Broth has a cleaner, lighter taste than stock and contains much less gelatin due to lower collagen content. Broth serves as an alternative to drinking plain water when ill; as a base for light soups; and as the contents of most commercial cartons. Compared to stock, broth is quick to prepare (usually taking less than three hours); and while suitable for many applications, it has fewer opportunities for rich, gelatinous additions – essential for serious cooking.
When to utilize each
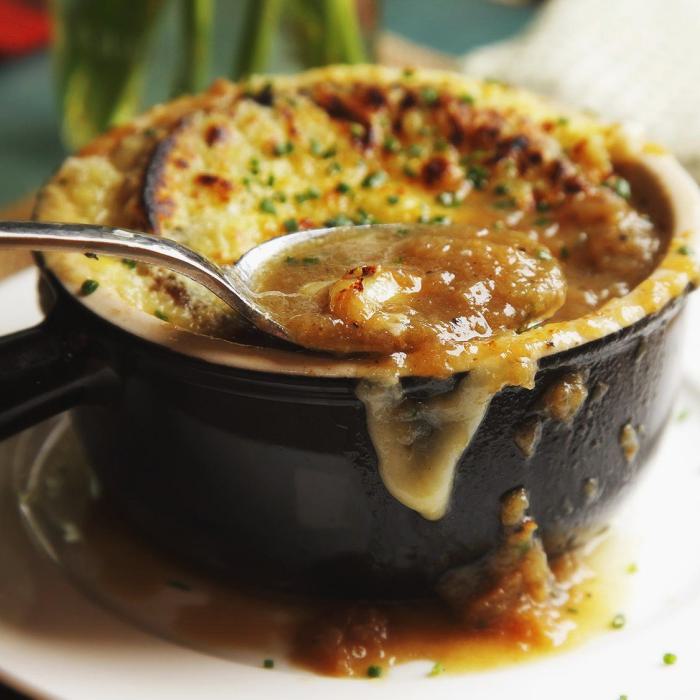
Utilize stock when you require depth and body – pan sauces, risotto, braises and French onion soup all greatly benefit from a gelatinous stock. Utilize broth when you prefer a lighter result or when the stock will be utilized in quantity – i.e., chicken noodle soup; or cooking rice/grains. Practically speaking, most home cooks create stock and adjust seasoning at the conclusion of each dish.
The Four Basic Stocks All Home Cooks Must Understand
Classic French cuisine recognizes dozens of various stocks, however for home cooks, four cover virtually every possible culinary scenario:
- Chicken Stock – the ultimate workhorse
- Beef Stock – the extremely flavorful base
- Vegetable Stock – very quick and adaptable
- Fish Stock – rapid and delicious for seafood applications
Each of these stocks has varying characteristics in terms of flavor; preparation technique; and recommended applications.
Chicken Stock – The Ultimate Workhorse
Chicken stock is the workhorse of home cooking. Chicken stock's flavor is mild yet versatile enough to complement virtually every form of dish imaginable -- i.e., soups; risotto; pasta sauces; braise vegetables; and pan sauces for both chicken and pork. Additionally, it's the simplest stock to prepare due to readily available low-cost chicken bones that break down relatively quickly compared to beef bones.
To create the perfect chicken stock begin with raw bones -- backs/neck/feet (if available), since foot bones have excessive collagen. Roast the bones at 200°C (400°F) for 30-40 minutes or until golden. These provide a richer, deeper flavored stock with more complex flavor than un-roasted bones. Choose based upon what you intend to create with your chicken stock. Add the typical aromatic combination of mirepoix (carrot/celery/onion) along with pepper/bay leaf/sufficient cold water to cover by 10 cm. Gently bring the mixture to a simmer -- never boiling -- and allow it to cook for 3-4 hours while removing foam periodically.
Beef Stock – The Deep Rich Building Block
Preparing a great beef stock requires more time & effort than preparing chicken stock, but it will produce a rich, deep flavored liquid that elevates braising liquids/stews/French onion soup etc... to new heights. The key differentiator in technique is roasting the beef bones prior to making the stock -- typically at 220°C (425°F) for 45-60 minutes until highly browned. The Maillard reaction occurring on the outer surfaces of the bones produces the deep red color and complex roasted flavors of beef stock. Typically vegetables are roasted along with bones for similar reasons.
A beef stock needs at least six hours of simmering time -- some recipes recommend up to twelve hours -- because beef bones are dense and take longer for their collagen to be released. A properly done beef stock should be extremely dark (almost mahogany) and firm upon cooling. If your beef stock fails to gelatinously solidify, it was likely insufficiently cooked or had inadequate collagen-rich bones in addition to possibly having too few collagen-rich bones -- try adding split pigs trotters next time for guaranteed gelling.
Vegetable Stock – Fast, Flexible & Often Overlooked
Vegetable stock has been considered a second-rate option compared to meat-based stocks for years -- but when made correctly, it offers a genuine alternative. A carefully constructed vegetable stock can rival meat-based stocks in terms of flavor, and is completed in approximately 45 minutes to an hour — offering by far the fastest preparation times among all stocks. The secret lies in selecting vegetables that add flavor without overpowering the stock. Onions, leeks, carrots, celery, garlic & mushrooms form the core. Mushrooms in particular add strong umami elements that compensate for lack of animal presence. Avoid starchy vegetables such as potatoes (which cause stock to become cloudy/thickened) and cruciferous vegetables like broccoli or cabbage (that will add sharp sulfur flavors that overpower all else).
Like meat-based stocks — vegetable stocks should not simmer for prolonged periods of time. After 45 minutes — once vegetables have contributed their greatest potential flavor — continued cooking will extract additional bitter compounds. Remove the vegetable pieces immediately after completing cooking and add minimal salt. Adding white wine during initial steps enhances freshness & characterizes vegetable stocks unlike anything else.
Fish Stock – The Quickest & Best Option for Seafood
Fish stock is probably the scariest for home cooks, and one of the least common forms of stock — which is unfortunate as it represents perhaps the quickest form of stock creation & unlocks an entirely new world of seafood-based sauces/soups that would be impossible to replicate with any other options. Frames — consisting of fish bones/head/ribs — constitute the basic raw materials. Simply ask your fish monger — they are typically inexpensive or free as they get discarded by most stores.
As mentioned earlier — fish frames hold different proteins than those found in animal bones — therefore fish bones must not be cooked beyond twenty-five minutes. Continued cooking past this point will extract bitter/unpleasant tasting flavors — ruining any remaining fish stock. Briefly sweat frames in butter with shallots/fennel/white wine prior to adding cold water & cooking gently at most twenty-five minutes — remove immediately & store within a couple of days or freeze in small blocks — utilizing them later as required.
The Techniques Common to All Stocks
Regardless of whether you’re making chicken/vegetable/beef/fish stock — numerous universal techniques exist that separate good-quality clear-gelatinous stocks from inferior cloudy ones lacking flavor:
Begin with cold water
Always begin your stock-making endeavor with cold water - never hot water! As described previously, starting cold allows you to draw impurities from the bones gradually (blood proteins & fats) providing you ample opportunity to skim-off these impurities as foam rises to the top during cooking. By beginning with hot water you force these proteins into immediate coagulation & subsequently render the stock cloudy & greasy/muddy-flavored. Only a handful of slow-moving bubbles rising to the surface indicate sufficient heat-extraction - if you notice vigorous boiling action instantly reduce heat.
Regular foam-skimming
During the first 20-30 minutes of simmering, activity will occur around the top of your pot – grey-brown foam forming above your liquid indicating coagulated protein & impurities released by your bones. Skim this foam regularly with a ladle or large spoon & discard it. Continue doing this until no more foam appears on surface & your pot appears relatively clear – then you can let your stock continue simmering without much interference.
Don’t over-season during simmering
As your stock simmers it will concentrate & if overly-seasoned during the cooking process could result in an excessively salty final product. Therefore lightly season your stock during cooking (or better still do not season at all!) – allowing you complete control over final seasoning when using the stock in subsequent meals.
Proper straining & cooling
Strain your finished stock through a fine-mesh sieve - preferably lined with a cheesecloth for ultimate clarity. Do not squeeze or press your solids when straining – forcing impurities or cloudy particles through your mesh sieve will negatively impact appearance, color and flavor. Allow gravity to perform its function. Once strained, allow your stock to rapidly cool (place pot into sink filled with ice water and occasionally stir) before refrigeration.
Storage, Freezing, and Utilization of Stock
Homemade stock can be stored safely in the refrigerator for 4-5 days or up to 6 months in the freezer. Convenient storage options include freezing stock in multi-format containers: large portions in 500 ml containers for soups/stews/etc., and smaller amounts in ice-cube trays for when you need only a small portion of stock. Frozen cubes can be removed individually from ice-trays & stored together in ziplock bags. Having access to multi-portions means you always have just enough of whatever you need without wastage.
Before storing your homemade stock, consider concentrating it via reduction by half or even further - resulting in what is called glace. Reduced stock will occupy far less storage space in the freezer & when thawed out can easily be reconstituted with additional water if desired - a single tablespoon of glace dissolved into one cup of water can produce an incredibly flavorful stock - frequently equal to or greater than full volume versions as all flavor compounds have been concentrated and densified during the reduction process.
Why Homemade Stock Will Always Be Worth the Time
While commercial stock/broths have dramatically improved recently -- decent low sodium cartons are now an excellent alternative to homemade stock -- but they will forever fall short in terms of what homemade stock adds to any dish due to lack of gelatin contained therein. Gelatin equals body, mouth feel, and the way sauce clings to meat or veggies… none of which can ever be replicated via cartoned or bottled stock products!
Time invested in creating homemade stock is also far shorter than most home cooks believe -- creating a homemade stock involves almost zero hands-on time -- merely roast bones, pour water over them, then let them simmer while you focus on other tasks entirely! Total active time spent creating most stocks rarely exceeds thirty minutes.
The reward provided by investing time creating homemade stock is weeks worth of an integral component (stock) that elevates everything you use it in! Create one batch of homemade chicken stock -- discover the flavor enhancement in the first dish you utilize it in -- & you’ll instantly realize why professional kitchens continuously make it!